A flat tire can happen anywhere — on a busy highway, a quiet country road, or even outside your home. Knowing how to change a tire is one of the most practical and empowering skills every driver should learn. Instead of waiting hours for roadside assistance, you can confidently handle a roadside tire change yourself.
This comprehensive tire changing guide will walk you through everything — from preparation and safety to the exact steps to change a flat tire correctly. You’ll also learn expert tire removal tips, proper wheel nut tightening techniques, and essential car jack instructions to ensure a safe and smooth flat tire replacement.
Whether you’re a beginner or just need a refresher, this detailed guide will help you master the DIY tire change process with confidence.
Understanding the Core Concept: How to Change a Tire (NLP Breakdown)
Before we dive into the practical process, let’s briefly understand the core action:
- how (WRB – wh-adverb) → indicates instruction
- to (TO – infinitive marker)
- change (VB – root verb, action)
- a (DT – determiner)
- tire (NN – noun, singular vehicle component)
Semantic Roles
| Role | Meaning |
|---|---|
| Agent / Actor | You (the driver performing the action) |
| Patient / Theme | The tire (vehicle component being replaced) |
| Purpose / Goal | Learning how to perform the task safely |
The central action is change — and the object is the tire, a critical vehicle component responsible for traction, balance, and safety.
Now let’s move into the actual process.
Why Every Driver Should Know How to Change a Tire
Learning how to change a tire isn’t just about convenience — it’s about safety, independence, and preparedness.
Key Benefits:
- ✔ Avoid long roadside assistance waits
- ✔ Save emergency service costs
- ✔ Increase confidence in vehicle handling
- ✔ Stay safe in isolated areas
- ✔ Prevent further wheel damage
According to automotive safety reports, flat tires are among the most common roadside breakdown causes worldwide. Knowing the quick tire change method can reduce your downtime dramatically.
Essential Tools Needed for a Tire Change
Before starting any emergency tire change, ensure you have the right tools.
Basic Tools Checklist
- Spare tire (properly inflated)
- Car jack
- Lug wrench
- Wheel wedges
- Owner’s manual
- Flashlight (if at night)
- Gloves
- Reflective safety triangle
Tool Function Table
| Tool | Purpose |
|---|---|
| Spare tire | Replaces damaged tire |
| Jack | Lifts vehicle safely |
| Lug wrench | Loosens/tightens wheel nuts |
| Wheel wedges | Prevents vehicle rolling |
| Flashlight | Improves visibility |
Understanding how to use a jack and wrench correctly is essential for safe car wheel replacement.
Tire Changing Safety Tips You Must Follow
Safety comes first in any flat tire replacement.
Important Safety Rules:
- 🚗 Park on flat, stable ground
- 🔒 Engage parking brake
- ⚠ Turn on hazard lights
- 🧱 Use wheel wedges
- 🧤 Wear gloves
- 🚫 Never place any body part under a lifted vehicle
Quote: “Most tire change injuries happen due to improper jack placement.”
Always prioritize tire changing safety tips before beginning.
Step-by-Step: How to Change a Tire Safely and Correctly
Now let’s go through the detailed steps to change a flat tire.
Step 1: Pull Over Safely
When you notice a flat tire:
- Reduce speed gradually
- Avoid sudden braking
- Find level ground
- Turn on hazard lights
This ensures safe conditions for your roadside tire change.
Step 2: Apply Parking Brake and Secure the Vehicle
- Engage parking brake
- Place wheel wedges behind tires
This prevents rolling during the tire removal process.
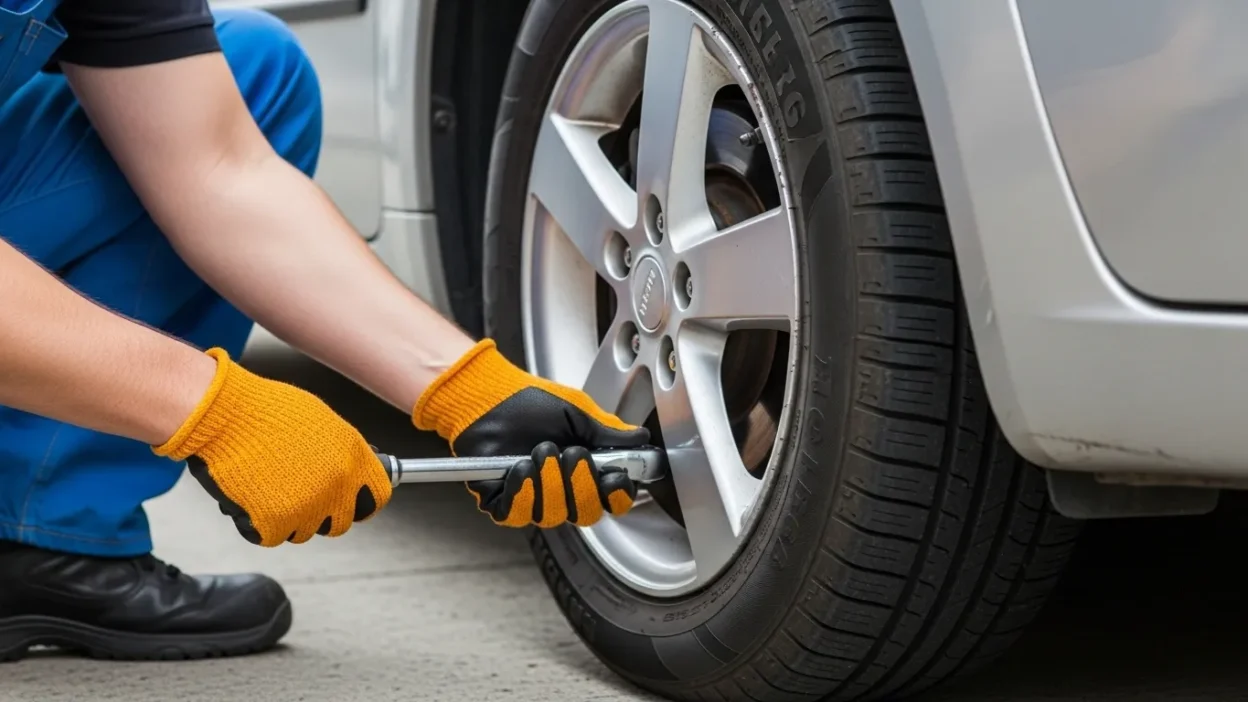
Step 3: Remove Hubcap and Loosen Lug Nuts
Before lifting the vehicle:
- Use wrench to loosen lug nuts
- Turn counterclockwise
- Do not fully remove yet
⚠ Loosening before lifting ensures better leverage.
This is a key part of tire removal tips many beginners overlook.
Step 4: Proper Car Jack Instructions
Understanding correct car jack instructions is critical.
How to Position the Jack:
- Check owner’s manual for jack points
- Place jack under reinforced frame area
- Ensure stable positioning
Then:
- Turn jack handle clockwise
- Raise vehicle until tire clears ground
Never lift on unstable ground.
Step 5: Remove Lug Nuts and Take Off the Tire
Now:
- Fully unscrew lug nuts
- Keep them in safe place
- Pull tire straight toward you
You have now removed the damaged tire successfully.
Step 6: Mount the Spare Tire
Align spare tire with wheel bolts.
- Push tire firmly onto hub
- Hand-tighten lug nuts
This step begins the replace spare tire process.
Step 7: Lower the Vehicle
Slowly lower jack until tire touches ground but doesn’t carry full weight.
This allows proper wheel nut tightening.
Step 8: Tighten Lug Nuts Properly
Use star pattern tightening:
- Top
- Bottom
- Left
- Right
- Remaining nut
This ensures even pressure during car wheel replacement.
Step 9: Fully Lower Vehicle and Final Tightening
Lower vehicle completely.
Then:
- Tighten lug nuts again firmly
- Avoid over-tightening
Your DIY tire change is nearly complete.
Step 10: Store Equipment and Check Pressure
- Put flat tire in trunk
- Store jack and tools
- Check spare tire pressure soon
Remember: Most spare tires are temporary (donut tires).
Quick Tire Change Method (Emergency Situations)
If stuck in dangerous location:
- Move vehicle slightly to safer spot
- Perform minimal safe procedure
- Install spare temporarily
- Visit mechanic immediately
The quick tire change method prioritizes safety over perfection.
Common Mistakes When Changing a Car Tire
Avoid these errors:
- ❌ Lifting car before loosening nuts
- ❌ Jacking at wrong point
- ❌ Forgetting parking brake
- ❌ Uneven lug tightening
- ❌ Ignoring torque recheck
These mistakes can lead to wheel detachment.
Advanced Tire Removal Tips for Better Efficiency
Experienced drivers follow these tips:
- Spray rusted nuts with penetrating oil
- Use body weight on wrench
- Keep nuts in hubcap
- Check alignment before lowering
Professional mechanics use torque wrenches for precise wheel nut tightening.
Understanding Different Tire Types
Not all tires are the same.
Tire Types Table
| Type | Use |
|---|---|
| All-season | Daily driving |
| Winter | Snow/ice |
| Performance | High-speed grip |
| Spare (Donut) | Temporary use |
Always match replacement with vehicle requirements.
When to Replace Instead of Repair
Sometimes, repair isn’t possible.
Replace tire if:
- Sidewall damage
- Large puncture
- Severe tread wear
- Multiple repairs
A damaged sidewall cannot be safely patched.
Aftercare: What to Do After a Tire Change
Once you complete changing a car tire, follow these steps:
- Drive slowly
- Visit mechanic
- Check alignment
- Retighten lug nuts after 50 km
This ensures safe long-term driving.
Cost Comparison: DIY vs Roadside Assistance
| Option | Average Cost |
|---|---|
| DIY tire change | Free (if tools available) |
| Roadside assistance | $50–$150 |
| Tow service | $100–$300 |
Learning how to change a tire can save significant money over time.
How Long Does It Take to Change a Tire?
| Experience Level | Time Required |
|---|---|
| Beginner | 30–45 minutes |
| Experienced | 10–20 minutes |
| Professional | Under 10 minutes |
With practice, your emergency tire change becomes much faster.
Frequently Asked Questions About Changing a Car Tire
Is it safe to change a tire alone?
Yes, if proper tire changing safety tips are followed.
Can I drive long distance on spare tire?
No. Most spare tires are limited to 50–80 km and max 80 km/h speed.
What if lug nuts are stuck?
Use penetrating oil and apply steady pressure.
Pro-Level Advice for Roadside Tire Change
Experts recommend:
- Carry portable air compressor
- Keep reflective vest
- Practice at home once
- Inspect spare monthly
Preparation reduces stress during real emergencies.
Complete Tire Change Checklist
Before Driving:
- ✔ Spare inflated
- ✔ Jack functional
- ✔ Wrench available
- ✔ Reflectors in car
After Tire Change:
- ✔ Lug nuts tightened
- ✔ Tools stored
- ✔ Mechanic appointment scheduled
Final Thoughts on How to Change a Tire
Learning how to change a tire is an essential life skill every driver should master. It’s not just about replacing a damaged tire — it’s about confidence, safety, and independence on the road.
By following this comprehensive tire changing guide, using proper car jack instructions, and applying the correct wheel nut tightening method, you can complete a safe and efficient flat tire replacement anytime.
Practice once in a safe environment so you’re prepared for real emergencies. The more familiar you are with the steps to change a flat tire, the faster and safer your DIY tire change will become.

I’m Elijah, the mind behind Punsboxx.com. As a true Pun Master, I love twisting words into clever laughs and serving fresh humor that never goes out of style!